


Bei Einladung.com finden Sie vor allem viele Ideen und Vorlagen rundum die Einladung und für Einladungskarten. Ob Sie nun demnächst einen runden Geburtstag feiern, Ihren Renteneintritt oder Ihre Pension feierlich begießen wollen oder ein Mottofest geplant haben. Das kann ein Kindergeburtstag sein oder eine Feier für ein erwachsenes Geburtstagskind. Eventuell steht in Ihrer Familie eine Hochzeit, Verlobung oder ein Jubiläum des Eheversprechens an. Wir haben (fast) für jede Feier eine thematisch passende Einladung, die Sie selbst gestalten können. Schnuppern Sie einfach mal durch unsere vielen Themenbereiche!
Planen Sie ein größeres Geburtstagsfest zu dem Sie im angemessenen Stil einladen möchten?
Sie finden hier für jedes Alter Ideen, wie Sie dazu einladen können. Auch haben wir Anregungen zum Feiern, von Garten- bis Mottoparty. Hier finden Sie ausgesuchte Vorlagen und viele Tipps für einen gelungenen Geburtstag.
Werden Sie bald Rentner oder Pensionär? Diesen neuen Lebensabschnitt können Sie mit einem tollen Fest einläuten, bei dem Sie Ihr Arbeitsleben mit Würdigung abschließen. Für diese Feier haben wir unterschiedliche Anregungen und Ideen für die Einladungstexte. Mit unseren Vorlagen laden Sie auf lustige oder nachdenkliche Weise zur Feier Ihrer Pension oder des Erreichens Ihres Rentenalters ein.
Mal etwas anderes, ein Mottogeburtstag! Ganz besondere Geburtstage sind Mottogeburtstage. Darum sollte eine zum Motto passende Einladung, auf der die Wünsche des Gastgebers stehen, nicht fehlen. Es gibt Mottopartys für Erwachsene und Kinder für die Sie hier passende Vorschläge für Einladungskarten sowie Party-Ideen finden.
Wollen Sie miteinander trauen? Für diesen speziellen Tag in Ihrem Leben haben wir verschiedene Tipps gesammelt. Zu den Anregungen gehören Ideen zur Hochzeitsdeko genauso wie die Vorstellung eines Kartensets im gleichen Design rundum Ihre Trauung. Wir stellen Ihnen unsere Save the Date-Karten, Einladungen zur Hochzeit samt Menü- und Dankeskarten vor. Sie finden Druckvorlagen im klassischen Stil sowie mit modischen Dessins. Auch finden Sie verschiedene Einladungstexte für einen der schönsten Tage Ihres Lebens, den Tag der Eheschließung.
Ob Geschäftsjubiläum oder Ehejubiläum – die klassischen Daten von silbernem und goldenem Jubiläum werden überall gefeiert. Auch die kleineren Jahrzehnte oder das Bestehen Ihrer Ehe oder Ihrer eigenen Firma seit 5 Jahren sind ein Fest wert. Für Ihre Feier finden Sie, neben der Bedeutung der Bezeichnungen, tolle Einladungstexte und schöne Vorlagen zum Drucken. Mit diesen Einladungskarten wird Ihr Jubiläum garantiert gebührend gefeiert.
Sind Sie umgezogen oder möchten Sie Ihre Firma oder Praxis einweihen? Feiern Sie bald ein Richtfest oder eine Housewarmingparty? Für diese Einweihungen haben wir ein paar Anregungen für Sie. Zum Stichwort Einweihung finden Sie unterschiedliche Kartenvorlagen für Einladungen. Damit steht einem perfekten Start Ihres Geschäftes oder Ihres Lebens an einem neuen Wohnort nichts mehr im Wege!
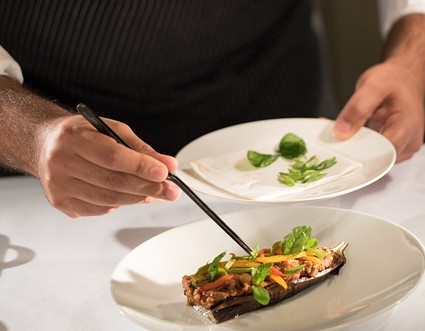
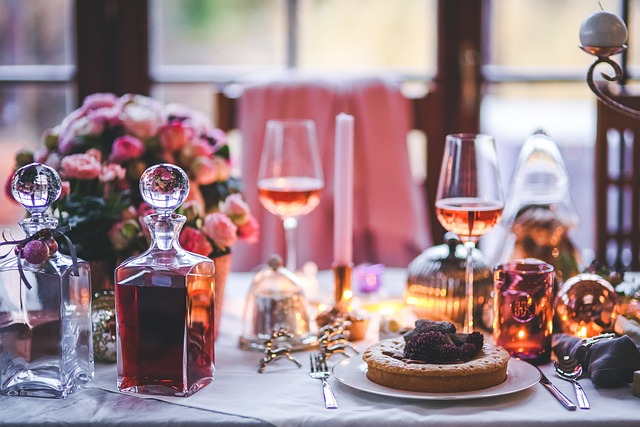
Darüber hinaus helfen wir Ihnen auf die Sprünge mit vielen Tipps zur Feier: Von Ideen zur Einladung selber, über Gedichte, Sprüche und Textvorlagen, bis hin zu Anregungen zur Organisation einer Feier. Ob es sich um die Gestaltung eines Hochzeitsbanketts, einer Gartenparty oder eines Oktoberfestes handelt, bei uns erhalten Sie Anregungen. In manchen Blogartikeln haben wir Beispiele für eine passende Deko, in anderen stehen Serviervorschläge zum festlichen Essen. Bei den Artikeln über Kindergeburtstage finden Sie auch oft Spielvorschläge. Denn kein Fest gleicht dem anderen! Lassen Sie sich inspirieren…
Suchen Sie einen treffenden Einladungstext für das von Ihnen gesuchte Ereignis? Es gibt sehr sachliche und kurze Texte beispielsweise zum Einladen zur Taufe, zur Hochzeit oder zu einem Jubiläum. In anderen Fällen sind es mehrere Zeilen, die den Leser zum tatsächlichen Kommen zur Feier animieren möchten. Für alle Wünsche des Gastgebers sollten Sie etwas finden können. Sie selbst passen dies dann auf Ihre Gelegenheit an, das ist gar nicht so schwer!
Da brauchen Sie selbst kein Dichter zu sein! Ob Geburtstag, kirchliche Feste, wie Taufe, Kommunion und Konfirmation, Ehejubiläen oder Firmenjubiläen: oft gibt es kleine Gedichte, die den Kern des Festes auf der Einladung zusammenfassen. Einige dieser Einladungsgedichte haben wir unter dem jeweiligen Thema in einen Artikel eingebettet, sodass sie passend zum Thema einen Vierzeiler oder ein längeres Gedicht finden werden.
Selbst gestalten
Nichts passendes gefunden? Dann erstellen Sie doch selbst Ihre Einladung! Sehr persönlich! Ausgehend von einer blanko Karte gestalten Sie mit den verschieden Schriftfonts Ihren Text in unterschiedlichen Größen und Farben. Dazu klicken Sie in dem Design-Tool noch Ihre gewünschten Abbildungen an, wenn Sie das möchten. Auch können Sie die Hintergrundfarbe oft anpassen sowie diverse Rahmen verwenden, um besondere Effekte auf Ihrer Einladungskarte zu erzeugen.
Bei Trendthemen erwartet Sie das, was gerade den Zeitgeist in der Partywelt bewegt: Sowohl Klassiker wie Alpenglüh’n oder Oktoberfest fallen darunter als auch die nicht unterzukriegende Bad Taste Party. Für Kindergeburtstage gehört klassisch beispielsweise das Piratenfest dazu und natürlich die Minecraft-Party. Und vor allem: Doppel- und Dreifach-Geburtstage liegen heutzutage voll im Trend. Und wir zeigen Ihnen die schönsten Karten dazu.
Möchten Sie ein Hoffest feiern? Oder planen Sie eine Autorenlesung? Haben Sie einen Tag der Offenen Tür? Oder laden Sie zum gemeinsamen Wandern ein? Auch in der Firma kann man zu einer gemeinsamem Aktivität einladen– denken Sie beispielsweise an eine Betriebssportgruppe. Alle dort genannten Veranstaltungen fallen unter diese Rubrik: Wir bringen Sie auf Ideen, was Sie gemeinsam machen können. Gerne zeigen wir Ihnen Gestaltungsmöglichkeiten der Einladungen dazu. Manchmal lesen Sie für besondere Aktivitäten auch einen kurzen Einladungstext.